Keep Glasses in Headshots: Studio Tested 5° Tilt and Off Axis Lighting
%20(1)%201.png)
.png)
.png)
September 15, 2026
%20(1).jpg)

Wear your everyday glasses in your headshot if they’re part of how people actually recognize you. Recognizability beats a glare risk that any competent photographer already knows how to fix on set. The only real exception is when you need a specific image, like an ID photo, that requires unobstructed eyes. The rest of this guide walks through the prep, lighting, posing, and editing steps that keep your glasses looking natural instead of like two white circles where your eyes should be.
TL;DR:
- Proper lighting angles and using large, diffuse light sources are the most effective ways to prevent glasses glare in photos, surpassing coatings and filters.
- Small head and chin adjustments, or shifting the photographer’s position, can nearly eliminate glare without compromising a natural appearance.
- Wearing glasses that are part of your everyday look is recommended, with at least one without glasses if the photo is for official IDs or security purposes.
- In-camera fixes, such as careful lighting and posing, are preferable because heavy retouching can make images look artificial and often cannot fully restore obscured eye details.
- On-location sessions that include test shots and adjustments can deliver consistent, glare-free headshots without requiring extensive additional prep or specialist equipment.
A little prep on your end saves the photographer time and gets you better results. Most glare problems trace back to something fixable before the camera ever comes out.
Here’s what to pack and mention before your session:
Glare isn’t random. It’s physics, and it’s controllable the moment a photographer understands the angle between your lens, the light source, and the camera.
The standard fix is moving the key light off-axis and raising it above eye level, roughly 45 degrees above and 30 to 45 degrees to the side. That angle sends the reflection up and away from the lens instead of straight back into it. It’s the single most effective technique in the entire toolkit, and it works before any retouching software gets involved.
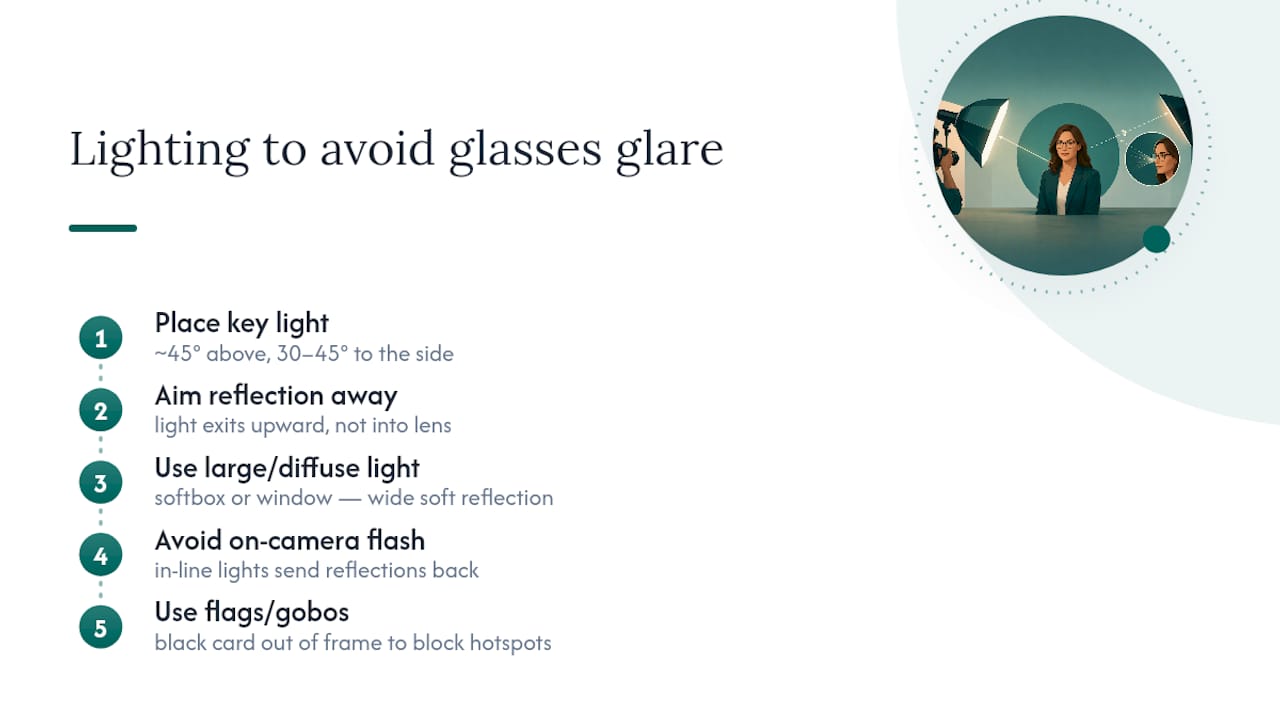
Light size matters almost as much as light position. Large, diffuse light sources like softboxes or window light soften reflections into a gentle wash rather than sharp hotspots, which is why photographers avoid small, hard light sources for anyone wearing glasses. A tiny bare bulb creates a pinpoint reflection that’s nearly impossible to hide. A big diffused panel spreads that same light across a wider area, and a wide, soft reflection is far easier to angle away from the lens or blend out later.
On-camera flash and ring lights are the classic mistake. Because they sit in line with the lens, they aim reflections directly back at the camera. Photographers either avoid them entirely for eyeglass wearers or bounce and diffuse them heavily before use.
For stubborn hotspots that survive the lighting setup, flags and small black cards (called gobos) block specific light paths without touching the overall exposure. A photographer can hold a black card just out of frame to kill one persistent reflection while leaving everything else lit normally.
Coatings and filters help, but they’re supporting players. Anti-reflective (AR) lens coatings reduce but do not eliminate reflections, and polarizing filters can help, but usually provide only modest improvement for face-on portraits. Neither replaces smart lighting geometry.
Pro Tip: If you’re being photographed by a friend or coworker with a basic setup, just moving one light higher and slightly to the side often kills 80% of the problem before you touch anything else.
Lighting solves most of the problem, but a few small adjustments to how you sit or turn your head can finish the job, especially with strong prescription lenses or curved frames that catch light at odd angles.
None of these moves should feel unnatural in the final shot. The best glasses headshots look like you just happened to glance at the camera, not like you were arranged around a lighting diagram.
A few decisions before the shoot day can save you from surprises once the camera starts clicking.
In-camera fixes should always come first, but a few editing tools exist as a genuine backup when a stray highlight survives the shoot.
Photoshop offers the most reliable manual toolkit. Common techniques include selecting the reflection with the Lasso tool, then using Clone Stamp, healing brushes, or Camera Raw adjustments to rebuild the eye detail underneath. Studio2U’s retouching approach treats this kind of fix as standard, not exceptional.
The math is simple: every minute spent adjusting a light on set saves ten minutes of pixel-level cleanup later, and the in-camera version almost always looks more authentic.
Most of the time, the decision is easier than people expect.
For more on choosing the right style for different platforms, this guide to professional headshot types breaks down which format fits which use case.
Studio2U runs the same workflow for every glasses wearer who sits in front of the camera: a fast test shot, a quick check of how the lenses are catching light, then small adjustments to pose or light position before the real shooting starts. Nothing is locked in until the reflections are gone.
The portable studio setup relies on large diffusers, an off-axis key light, and flags on hand for stubborn hotspots, the same geometry-first approach photographers rely on everywhere, adapted for fast turnaround across corporate teams. When a session covers dozens of employees back to back, that consistency matters more than any single clever trick.
Clients can request both with-glasses and without-glasses variants in the same sitting, with retouching available as a backup rather than a first resort.
Most advice about glasses in headshots spends too much time on gear, polarizing filters, special coatings, expensive lens treatments, and not enough on the two things that actually solve the problem: light position and a five-degree head tilt. That’s the gap worth pointing out. A $40 polarizing filter or a premium AR coating sounds like a fix, but neither replaces a photographer who knows to raise the key light and move it off-axis before pressing the shutter.
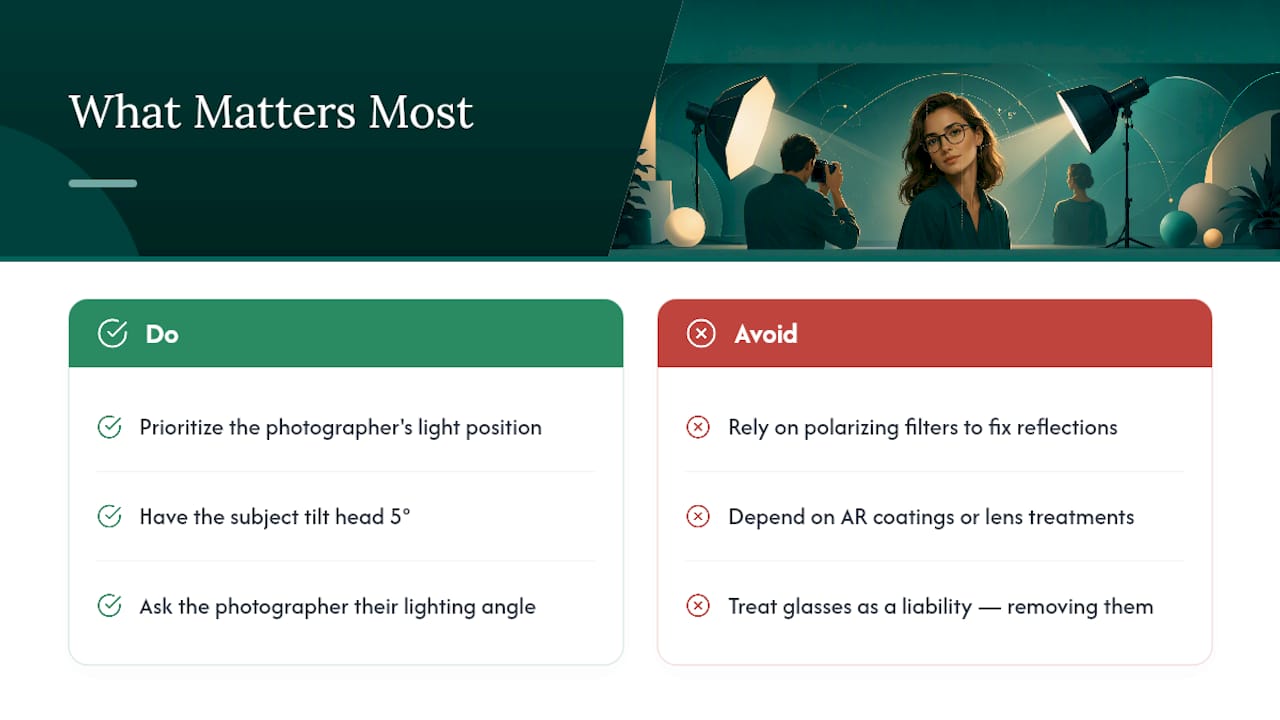
The bigger mistake I see in how this topic gets discussed is treating glasses as a liability to manage rather than a piece of someone’s identity. If you wear glasses every day, a headshot without them is a photo of someone slightly different from you. That mismatch shows up the moment a client meets you in person after seeing your glasses-free LinkedIn photo.
Prioritize the photographer’s lighting setup over anything you can buy or coat your lenses with. Ask about their approach before booking. If they can explain their lighting angle without hesitation, you’re in good hands.
— Kevin
You’ve just read what it takes to get this right: off-axis lighting, the correct modifiers, a few degrees of head tilt, and a photographer who tests before shooting. That’s exactly what Studio2U brings to your office instead of asking your whole team to travel to a studio and hope for the best.
Some on-location sessions come with the lighting geometry and tested workflow described throughout this article already built in, so your team doesn’t have to coach photographers on how to handle reflective lenses. Every glasses wearer in a session can get the same test-shot-and-adjust treatment. It’s possible to request both with-glasses and without-glasses variants, with retouching as a backup when a stray highlight sneaks through. If you’re scheduling headshots for a team, an office, or an event, get a quote from Studio2U and ask about scheduling a session at your location.
Yes, if glasses are part of your everyday look, since recognizability matters more than a glare risk your photographer can control with lighting and posing.
Avoid busy patterns, heavily reflective jewelry, and logos, but glasses themselves aren’t on that list. Wear them if you normally do; a good headshot outfit guide covers clothing choices in more depth.
Natural expression, accurate color, and clear eyes make the biggest difference, which is why photographers prioritize off-axis lighting over any single accessory or coating.
The biggest mistakes are removing glasses out of fear of glare, using harsh on-camera flash that creates reflections, and skipping a test shot before the real session begins.
Editing can fix small reflections using tools like the Clone Stamp or Camera Raw adjustments, but heavy glare covering the pupil is harder to reconstruct convincingly, so in-camera fixes should come first.
