3 Shots That Make Company Group Photos Work by Team Size and Tone
%20(1)%201.png)
.png)
.png)
September 12, 2026
%20(1).jpg)

The most reliable company group photo strategy combines three shots: one concept-led posed image with intentional staging, a set of candid action frames taken during real work, and a headshot grid if your team is spread across offices. This mix covers a website hero, social posts, and recruiting pages without a second shoot. Stagger people for depth and shoot in bursts of at least eight to ten frames per setup so you have options later.
TL;DR:
- Stagger group members’ heights and arrange them in geometric formations like triangles or V-shapes to create depth and visual interest, especially for larger teams.
- Use tiered staging such as stairs or risers for teams over 15 people to keep everyone visible, and shoot multiple frames to ensure a clear, eye-opened shot.
- Capture a mix of posed hero images, candid interactions, and detail shots, while planning and coordinating lighting, location, and wardrobe to match your brand tone.
- For remote teams, use consistent backgrounds and camera settings to create composite headshot grids or record video-call collages that appear cohesive and intentional.
- Bringing in a professional studio service simplifies logistics, guarantees consistent quality across multiple locations, and ensures fast turnaround for time-sensitive campaigns.
The right idea depends less on creativity and more on two things: how big your group is and what tone your brand wants to project. A fintech company photographing 200 employees needs different staging than a five-person design studio. Real, natural team photography also tends to outperform stock imagery for engagement, according to industry guides, which is the whole argument for skipping generic stock shots in the first place.
If you’re managing a distributed team’s imagery, our guide to company-wide headshots walks through scheduling logistics in more detail.
A rushed shoot produces unusable photos no matter how good the photographer is. Before anyone shows up with a camera, settle these:
Pro Tip: Block roughly 10 to 15 minutes per setup, plus a short buffer to brief the next group. Treat the first burst of frames as a practice run and the second as the one you’ll actually use, since almost nobody nails the pose on the first try.
Flat rows read as a mugshot lineup. Triangles and staggered wedges read as a photograph someone actually planned. The fix is geometric, not artistic: arrange people so the outline of the group forms a triangle, a V, or a staggered wedge rather than a straight horizontal line, since that kind of geometric staging is what creates visual depth instead of a flat, staged look.
A few staging rules cover most problems:
These specific fixes for flattering lines and posture matter more for larger groups, where one bad row can undo an otherwise good setup. On sets of 15 or more, expect to reshoot the same configuration multiple times just to get everyone’s eyes open and forward in a single frame.
Light quality decides whether a group photo looks premium or amateur, and it costs nothing to get right. Outdoors, shoot in open shade or during golden hour, the hour after sunrise or before sunset. Direct midday sun creates harsh shadows under eyes and blown-out highlights on foreheads, and no amount of editing fully fixes it.
Indoors, look for even, diffused light rather than a single overhead fixture, which creates raccoon-eye shadows on anyone standing slightly off-center. Watch for reflective surfaces like glass walls or monitors behind the group, since they pull focus and create distracting glare in the background.
Combining good light with deliberate staging is what separates a photo that looks cinematic from one that looks like a compliance document. If your office lacks a strong backdrop, our office backdrop ideas piece has low-cost fixes.
A logo or product should support the photo, not compete with it. Place signage or a product in the lower third or off to one side, never dead center blocking faces, and keep it in sharp focus while people remain the visual priority.
Coordinate color palettes loosely instead of forcing uniforms. Solid colors in a shared family (navy, gray, one accent color) photograph far better than a mix of busy patterns and clashing brights. Cheap props add narrative without a budget: branded mugs, a whiteboard with a hand-drawn logo, a company flag, or product boxes stacked as a visual anchor.
Pro Tip: If you’re shooting near a branded backdrop or booth wall for an event, treat the signage the same way you’d treat lighting equipment. It’s part of the setup, not an afterthought bolted on after the group is already posed. For sponsor walls and step-and-repeat setups, examples of corporate event displays show how signage placement can work with a crowd instead of against it.
Team size past 15 people changes the entire approach. What works for a ten-person startup falls apart once you’re arranging 60 employees across three departments.
For teams spread across multiple offices, the corporate headshot guidelines resource covers how to keep lighting and framing consistent enough that a composite doesn’t look stitched together.
Plan for three categories of frames: the posed hero shot, candid movement or interaction shots, and close-up detail shots (hands on a laptop, a logo on a door, a coffee cup on a desk). Budget roughly 20 to 30 frames per setup across posed and candid combined.
Retouching for a corporate shoot typically means color correction, skin smoothing, and background cleanup, not heavy digital alteration. Ask your photographer upfront what file types you’ll receive: high-resolution JPEGs for immediate use, RAW files if your marketing team edits internally.
Pro Tip: Shooting both posed and candid frames in the same session cuts down on reshoots, since you’ll almost always find one authentic candid moment that outperforms the stiff posed version anyway.
DIY works fine for a five-person team with a smartphone and good window light. It stops working once you’re coordinating multiple offices, a live event schedule, or a hard deadline tied to a funding announcement or product launch.
A production partner earns its cost in a few specific situations:
A specialized service operates by bringing portable studios directly to client offices and events nationwide, aiming to keep disruption to a normal workday minimal while still producing consistent, high-quality results across locations. Fast post-production turnaround matters here too: assets that arrive weeks after a launch or announcement have already lost most of their marketing value. For companies weighing whether to go in-house or bring in a team, the best corporate photography services breakdown covers how that logistics planning typically works.
A company photo that only shows half the team, or clusters certain people in the back row every time, sends a message whether you intend it or not. Representation in a group photo isn’t about hitting a quota. It’s about making sure the arrangement itself doesn’t quietly sideline people.
A few practical habits fix most of this:
Rotate who stands in the front row across different shoots rather than defaulting to the same leadership faces every time. Mix departments and seniority levels within each tier instead of clustering executives together and staff in the back, which visually implies a hierarchy nobody asked to broadcast. If your team includes remote or hybrid members, don’t quietly drop them from the “real” photo and stick them only in a digital add-on. Give the headshot grid the same visual weight and treatment as the in-person shot, not a lesser afterthought.
Consider physical accessibility during staging. Stairs and risers look great in photos but exclude anyone who can’t easily climb them, so build at least one setup around a ground-level or ramp-accessible configuration. If wardrobe guidance goes out, keep it broad enough that it doesn’t implicitly exclude religious dress, body types, or personal style. “Business casual in navy or gray” works for nearly everyone; a strict dress code rarely does.
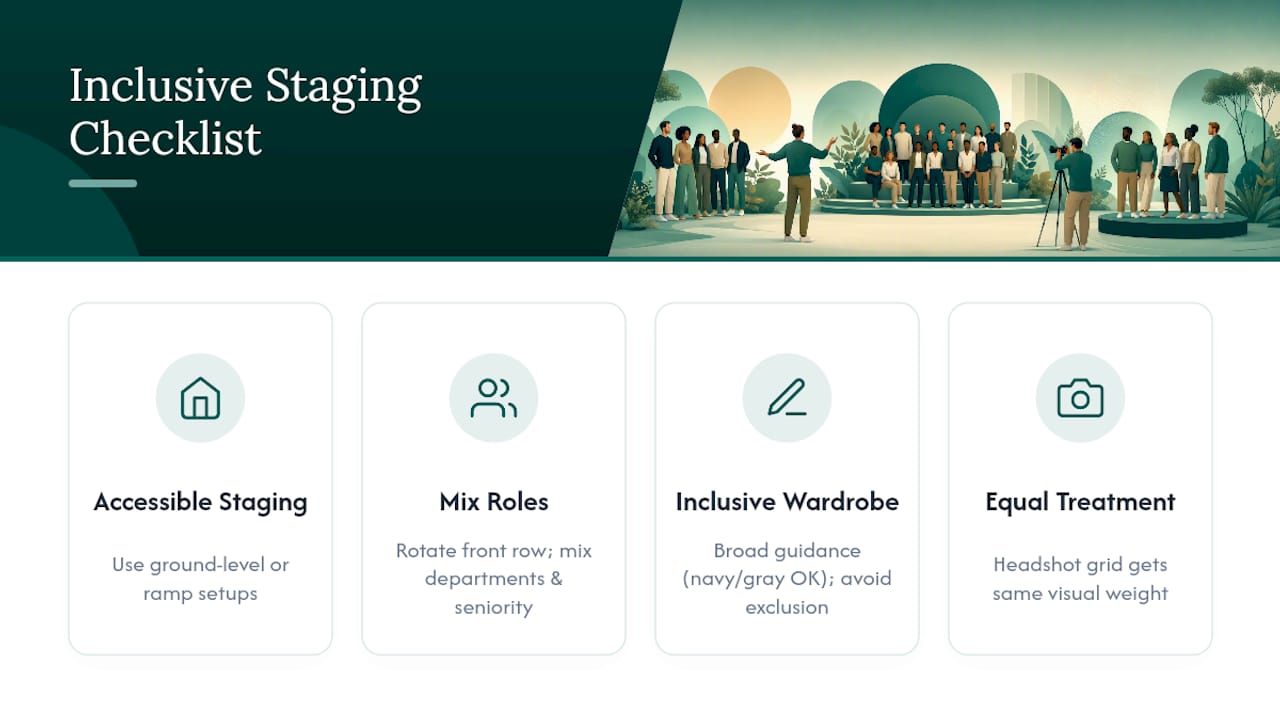
The goal is simple: look at the final image and ask whether it actually reflects who works at the company, not just who was easiest to arrange in the front row.
Ownership and usage rights should be settled before the shoot, not debated after someone spots their photo in an ad they didn’t expect to appear in. In most freelance and agency arrangements, the photographer retains copyright unless the contract explicitly transfers it, while the client receives a usage license for agreed purposes.
Get specific about scope in that agreement. Does the license cover the company website and social media only, or does it extend to paid advertising, recruiting materials, and press use? Is it a one-time license or does it renew annually? These distinctions matter more than they seem to at signing time, especially if a photo ends up in a national ad campaign nobody anticipated when the shoot was booked.
Individual employee consent is a separate issue from company-to-photographer licensing. Signed releases from each person photographed protect the company if someone leaves and later objects to appearing in current marketing material. This matters even more for former employees; a company photo featuring someone no longer on staff can create an awkward, occasionally legal, problem if it keeps running on the website a year later. Build a habit of refreshing group photos every 12 to 18 months, both for accuracy and to keep usage rights clean.
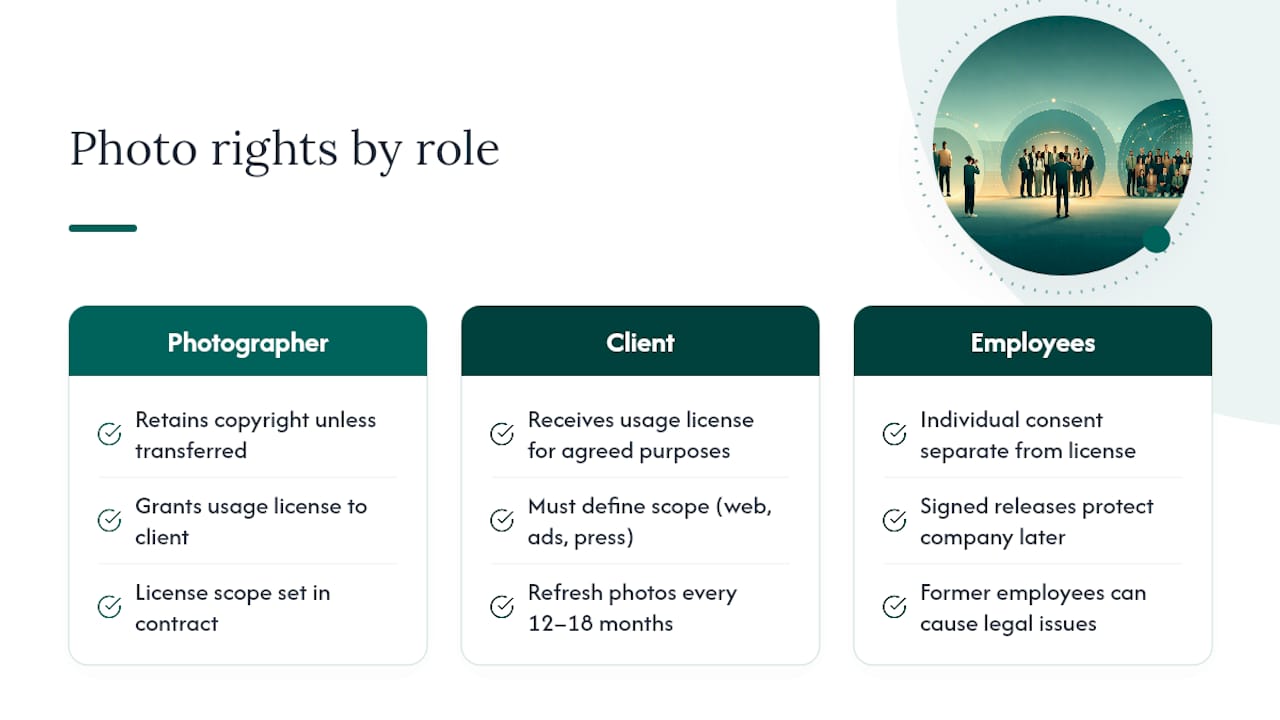
Most guides treat company group photos as a creativity problem. It isn’t. The teams that get good, usable images every time treat it as a logistics problem with a creative layer on top.
The conventional advice, “just make it fun and authentic,” skips the part that actually determines outcome: whether someone staggered the heights, whether the photographer shot a real burst instead of three frames, and whether anyone thought about where the photo would live before the shoot happened. A gorgeous concept staged on a flat single row with bad eyelines still looks amateur, no matter how good the idea was on paper.
If I had to prioritize one thing for a busy HR lead with limited time, it wouldn’t be picking the perfect concept from a list. It would be nailing the geometry: tiering, staggered heights, and enough burst frames to actually have options afterward. Concept is replaceable. A flat, hidden-face lineup is not fixable in editing. Get the staging right first, then worry about whether it’s a staircase shot or a confetti drop.
— Kevin
If reading through tiering, burst counts, and lighting setups made this sound like more coordination than your team has time for, that’s the exact gap studio2U exists to close. studio2U brings a portable studio directly to your office, event, or multiple locations, handling the staging, lighting, and posing logistics so your team shows up and the rest gets managed. That matters most for companies juggling more than one office or a hard deadline tied to a launch, funding round, or hiring push, where getting consistent results across locations without hours of internal planning saves real time.
Turnaround is built into the process as well: files are edited and delivered promptly enough to be used while a launch or announcement is still fresh, rather than weeks later when the moment has passed. If your team needs headshots, branding photography, or event coverage with minimal disruption to a normal workday, visit the studio2U home page to check availability and request a quote for your team’s next shoot.
Staircase cascades, overhead circle shots, confetti drops, and product-with-team formations all photograph well, but the strongest results come from pairing a posed concept shot with candid action frames taken during real work.
Try a walk-and-talk down a hallway, a desk huddle mid-conversation, or a headshot grid for remote employees. Each one reads as more authentic than a stiff, straight-on lineup.
Stagger heights using stairs or furniture, arrange the group into a V or triangle instead of a flat row, angle shoulders slightly toward the camera, and have one person call eyeline directions so everyone looks in the same spot at once.
Add depth through tiered staging, shoot both posed and candid frames in the same session, and use a backdrop that tells part of your brand’s story rather than a blank wall. Groups larger than 15 people specifically need tiering, since flat rows hide faces and flatten the composition.
